This page will document the installation of a VW 1.9 TD engine into my IIA.
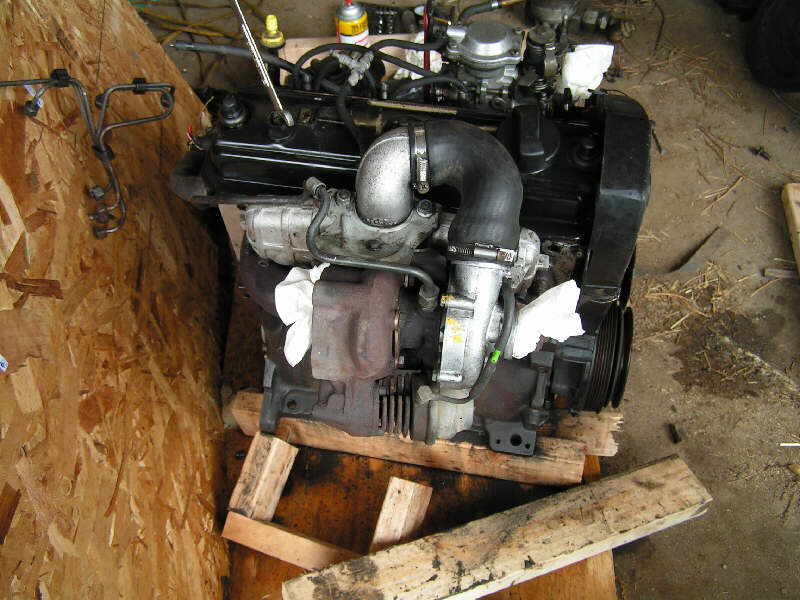
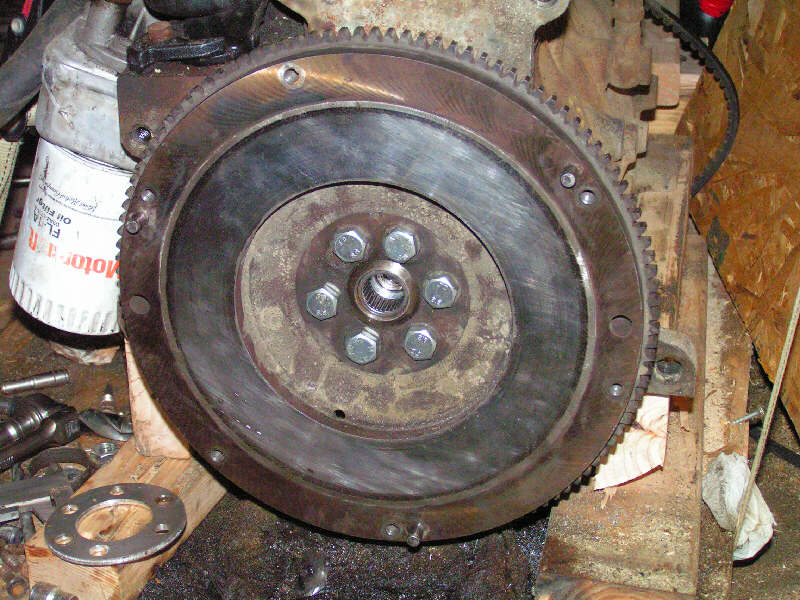
Here it is, looking at it from the turbo side.
 And
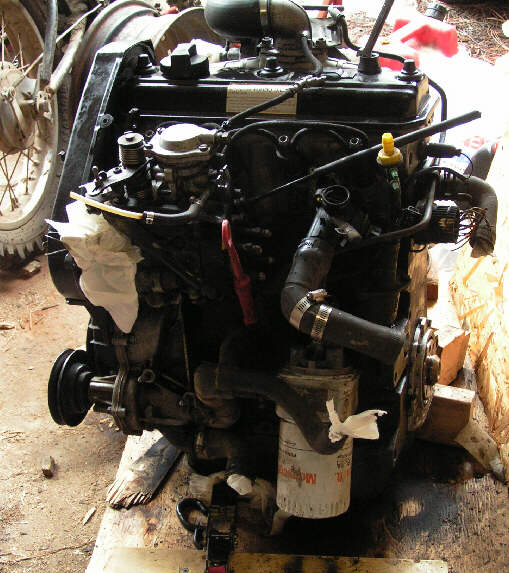
here is the injection side.
And
here is the injection side.
I decided on finally doing an engine swap in my Series. The old engine was getting tired and burning oil
and it was already .060 when I first got the Rover, and I had re-ringed it once. My options were another
stock motor, a Ford small block as I already have an adapter, or I was thinking about a Diesel as fuel
prices keep climbing. I wanted more power than the stock motor as I am tired of crawling up the passes
and holding everyone back when there are head winds, so stock was out. The Ford would definitely have
more power, but I doubt mileage would be that great. That left a Diesel. While a 200 TDI would be an
easy swap, parts are getting harder to find for them I hear. a 300 TDI would require a bit more work,
but I heard they aren't as easily available, and I imagine shipping from England would cost a bunch.
At one point, I was forced to ride along on a test drive in a TDI New Beetle. WOW, it had some get up
and go, and almost no lag, and great mileage. So I started looking into those. I found I could get a
used engine in the $2100-$2300 range, which isn't bad, but all those electronics, YUCK. I heard that
on some models you had to have the original ignition switch and dash for it to run. I knew that Samurai
owners sometimes do VW TDI swaps, so that is where I started looking. I never found what ECU I would
need or how to get past the security, but what I did find was a guy in Alaska with a Canadian VW TD for
sale, all mechanical, no electronics. I sold some stock, and the engine was soon on its way.
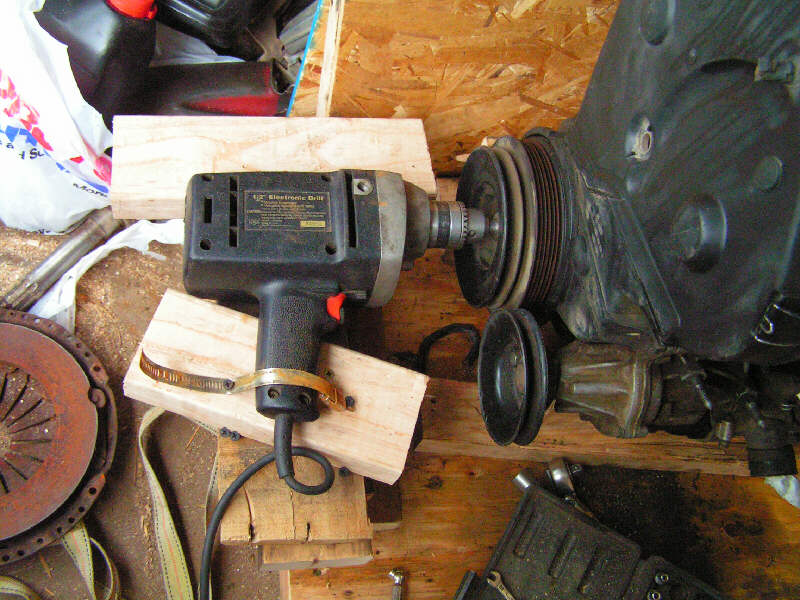
One of the first problems I encountered is that the hole for the pilot bushing is smaller than the input
shaft on the Rover tranny. Hmmm. The obvious choices were take the tranny apart and machine the
input shaft, or take the engine apart and get the crank machined. I really didn't want to do either. I
thought about some type of adapter that would bolt on to the crank, but that would push the engine
and tranny even farther apart. With some suggestions, I got the idea to machine the crank with it
still in the engine. I made an adapter to mount the bed of my small lathe to the back of the block.
I strapped my drill up front with a 3/4" socket to turn the engine. Pulling some of the glow plugs was
a bit of a pain, but since I have new ones, they were coming out anyway. The drill was working, but
it wasn't turning it terribly fast, and quite a load was being put on the poor thing. I slowly started
working, but had to stop frequently to let the drill cool. It finally was barely turning, and was starting
to smoke, so I decided I would have to go buy the biggest, baddest drill I could afford. I ended up
getting a 7.5amp Rigid with a 550 RPM speed. My old one was only 5 amp @850 RPM, so I was getting
more power and better gearing. This drill turns the engine with no problem, and stays cool to boot.
Project start date: 4/1/06
 The
old drill
The
old drill
The business end. Getting ready to enlarge the hole.
4/2/06
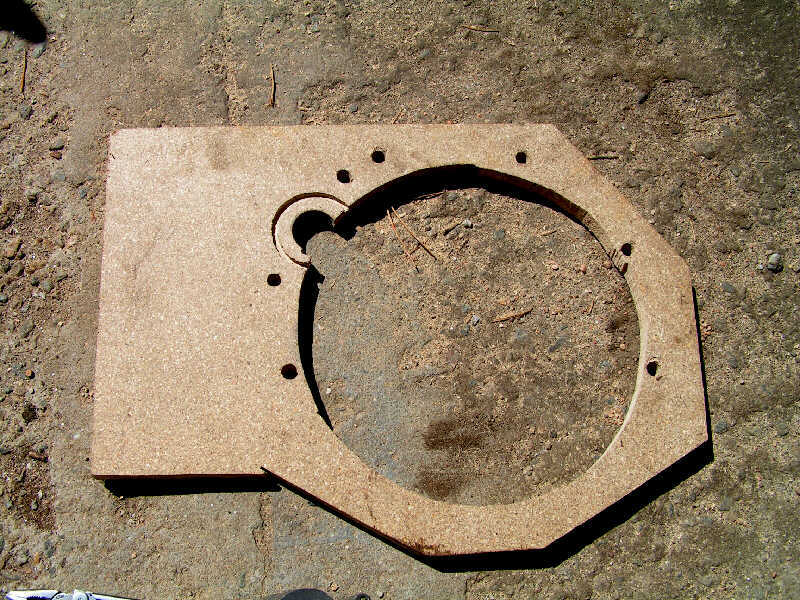
I
was working on the adapter today, making a template out of pressboard.
I thought I had
it
all figured out when all of a sudden I realized that the VW starter needs
to mount on the
transmission
side. That just wasn't going to work with the Series tranny. No more work
today
. 8*(
The
ill-fated adapter bolted up
 Tranny
and partial adapter.
Tranny
and partial adapter.
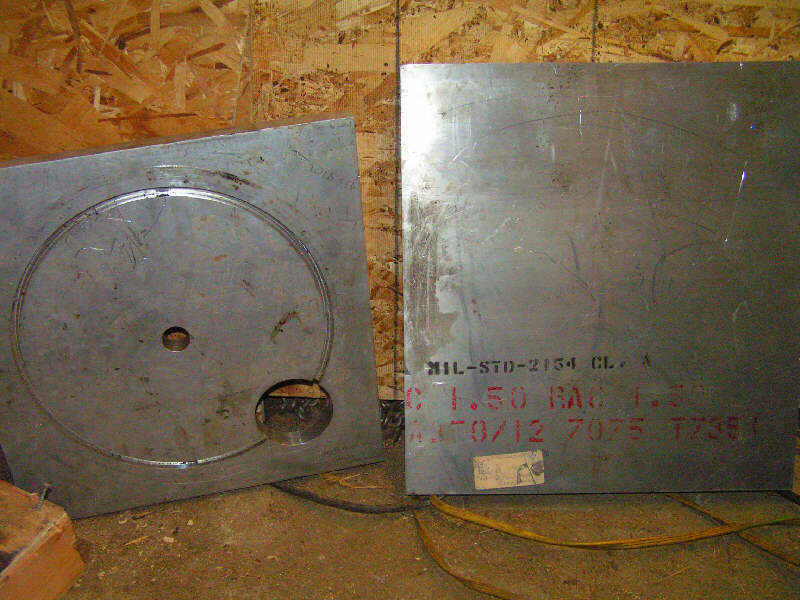
A
piece of 1" thick 6061 that was partially machined for a Series by the
previous owner, and
a
piece of 1.5" thick 7075. Both will need to be used for the final adapter.
4/4/06
I had to go to the dentist today, so I got off work early and afterwards
I stopped
by
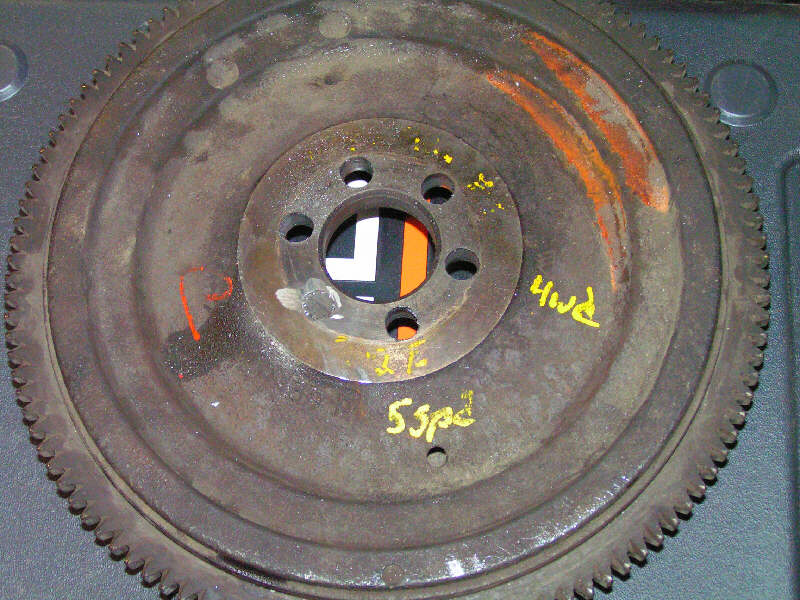
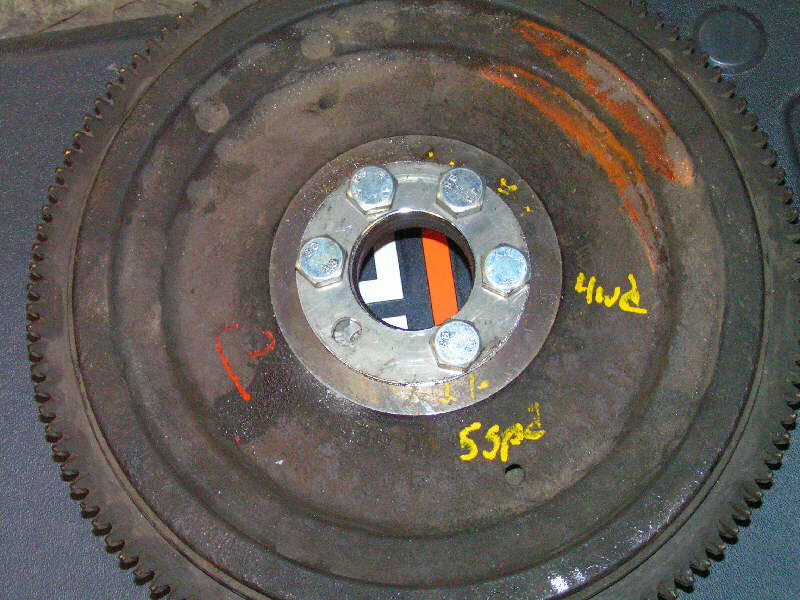
a junkyard. I heard Toyota flywheels are sometimes used in the Samurai
conversions,
so
I bought two different ones and their respective pressure plates. The center
holes are
just
slightly smaller than the VW, so it wouldn't be too hard to turn the crank
one more
time.
I heard that 5 of the 6 bolt holes would line up, and they were close on
the smaller
flywheel,
which takes an 8.75" clutch. the larger flywheel, 9.25" clutch, has 8 holes
on a
wider
circle, so it wasn't my first choice. the smaller one is from a Toyota
truck with a 22R
engine
and 5 speed, the larger from a v6 truck. I enlarged the 5 holes slightly
to allow the
bolts
to thread in.
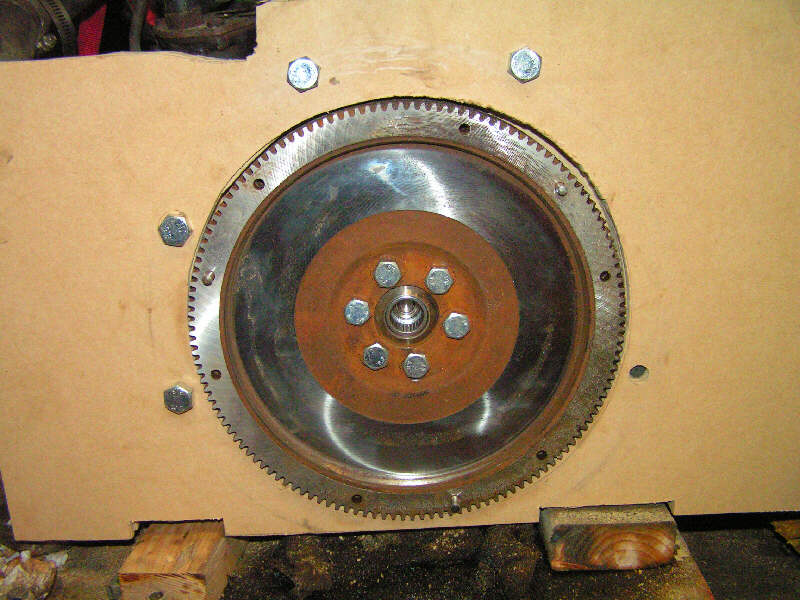
The flywheel after tapping
and grinding down a bolt to fill the hole.
Using
a spacer I had made for the VW flywheel as a template for where to drill
the new hole.
The
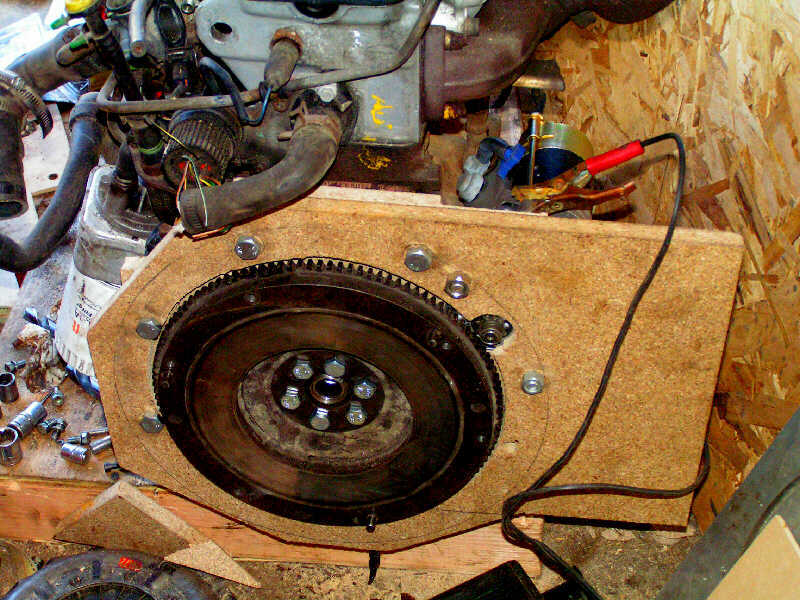
new flywheel bolted up. You can see the pilot bearing also.
4/5/06 No pictures today.
I got my clutch friction plate today. I had taken a chance and
bought a BMW 325 is disc
as it had the same spline count and diameter. I soon found out
that the width was different
though. I bought it because it was almost half the price of
a Rover one. I got some
files out and worked on it for a while and it fits perfectly now.
I also bought a Toyota
starter today. It is a gear reduction type and it should work with no
problems.
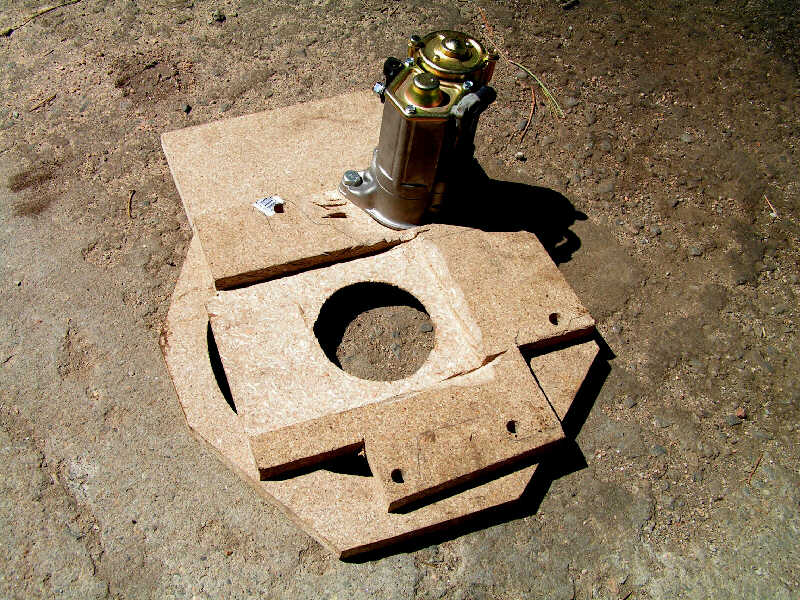
4/8/06
I took a couple days off due to being too tired after work, and cold, snowy
weather.
Today
it's already up to 60 and sunny, so I broke out some new pressboard and
started
cutting
and drilling. I am working with two 3/4" thick pieces this time as the
1.5" thick
aluminum
will be taking their place. I started by taking material off the back so
it would fit
over
the seal retainer on the block. With that, I started working on the 2nd
piece. I had to
cut
a new hole for the flywheel as it is slightly larger than the VW one. I
also decided to
make
a slightly thinner spacer as it was too close to the back for my
liking.
The 2nd half of the 1.5"
adapter. The groove and nose hole for the starter are visible.
The
engine side. Both halves are bolted together by the starter.
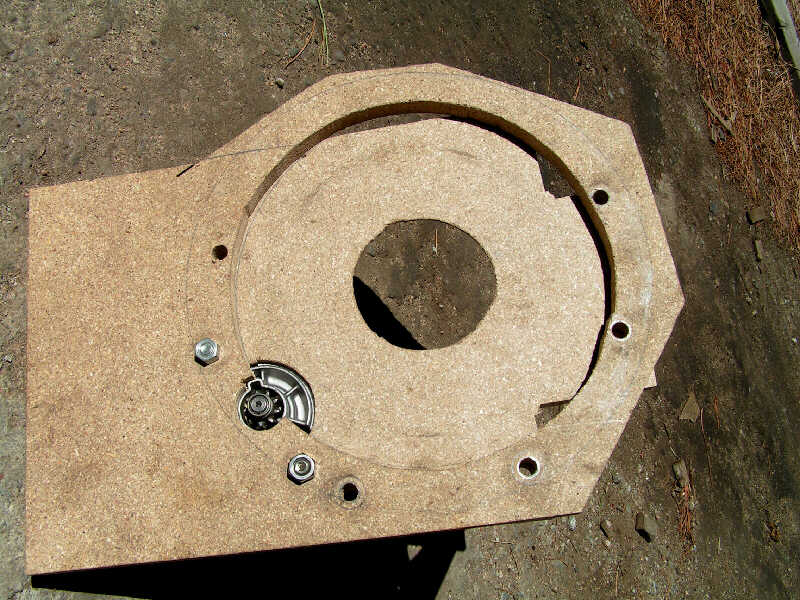
The
gear and nose of the starter. A couple bolt holes are close to the flywheel,
but won't
interfere.
For
the starter I just happened to have the exact size hole saw for the nose.
I drilled it so
I
could partly put the starter on. The nose is a tube like protrusion which
surrounds the
gear.
There is nothing on the other side of the gear to support the shaft, so
it doesn't
need
much room past the flywheel, unlike the Rover starter. Then I had to measure
to
figure
out how much I had to take off to get the correct depth for the starter.
It turns
out
that exactly 1/2" needed to be taken off. I also had to machine out a groove
for the
outer
ring on the mounting flange so the starter would sit down far enough. With
everything
seeming to fit just fine, I bolted it all together on the engine and hooked
up
a
battery charger to the starter. Upon energizing it, the engine started
to turn over.
SUCCESS!!!
Now I need to take the aluminum down to get the real machining done as
that
part is beyond my means. The 1" aluminum won't need much work, so I didn't
bother
to fab a template up for it. It will go between what you see below and
the tranny.
Everything
bolted together and ready to "start".
4/9/06
I
wasn't going to do anything today, but I decided I could drill the mounting
holes
and
the hole for the nose of the starter. I also marked up where all the machining
needs
to be done and how much needs to be taken off. I also went and picked up
a
Racor
filter and sediment filter from Dave Gomes. I put the new glowplugs in
and
the
fuel lines on the injectors.
4/14/06
I won't be able to get the adapter anywhere until 4/22 due to work, so
no
updates
until then.
4/23/06
Today I went up to Keith Kreutzer's, from Rover Tracks, to show him what
I
need done on the adapter. So it shouldn't be too terribly long before I
can start
working
in the swap again.
5/8/06
Still waiting on the adapter. I have started buying some of the gauges
I want.
So
far I have EGT and boost gauges. I still want to get new temp and oil pressure
gauges,
and a tachometer. Unfortunately there isn't a lot of room for a lot of
gauges.
I
have an aluminum dash which goes the full width of the bulkhead. The stock
Rover
dash
panel is bolted on top of this. I also have speakers and a stereo mounted
in it.
So
the only practical way to do it was get small gauges and put them in the
empty
space
between the steering column and the Rover dash panel. To make things
easier
to work on, I decided to cut the aluminum in two pieces, with the break
being
at
the left edge of the Rover dash panel. With the dash off, I also took the
opportunity
to
make a gasket to seal the steering column as it's been cold in the winter.
I will start
cutting
holes once I get all the gauges.
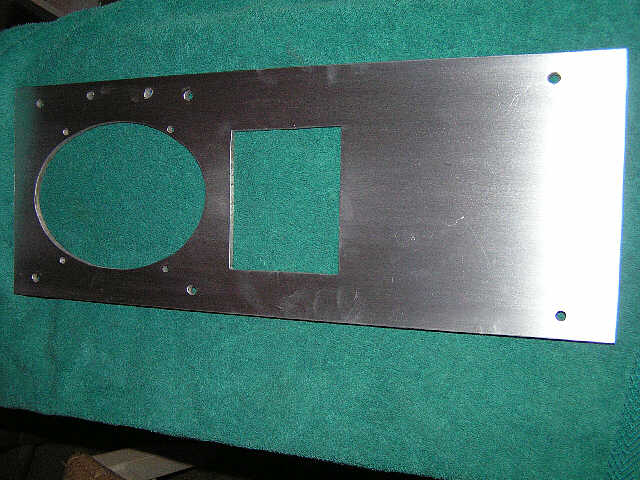
1/2
the dash panel. The gauges will be scrunched on the right side.
As of 6/11 I am still waiting on the adapter. Sucks, doesn't it!
8/6/06
I've
been slacking off on the updates. I got the adapter later in June.
I
had a few problems with it. The smaller ring only fits on the tranny
in
one direction, but it had been bolted to the other half in the wrong
direction
when the bolt holes and locating dowels were drilled, so I
had
to do a bit of re-drilling and tapping. There are also some gaps where
the
old and new starters are/were that will need to be covered. I
currently
have everything in my spare frame and have one motor mount
finished.
I may work on the second one if it doesn't rain, but the weather
is
looking doubtful. I was lazy, and put the new pictures up with JAlbum,
so
they can be seen HERE.
8/11/06
I
have both motor mounts made and have started on the exhaust.
Today
I also brought the Elephant Chaser to get dynoed with the
old
engine. Once the swap is done, I will bring it back to see the
difference.
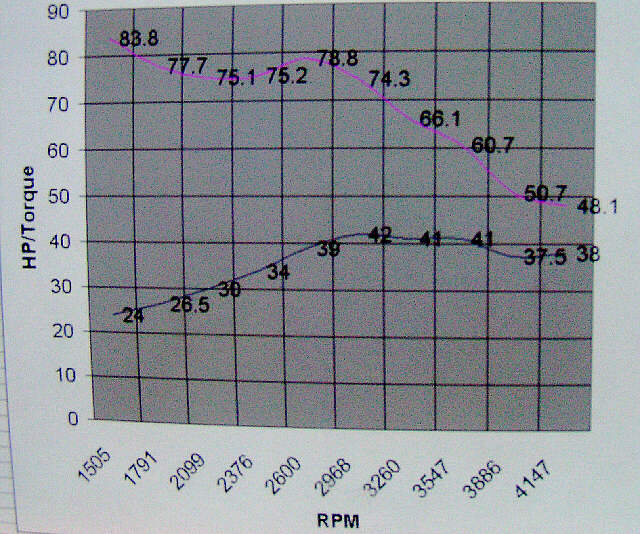
The data points are from 25 mph to 70 mph in 4th. I find it interesting
that the horsepower
seems to start climbing at 4147 RPM, and that peak torque is below
1500 RPM.
8/26/06
I got the engine and tranny pulled
out. I found the mainshaft nut was completely off. It
had been popping out of 3rd a bit,
and on a rare occasion out of 2nd. I drilled an
aluminum block to bolt on where
the heater hose outlet bolts to the back of the head.
The stock one was too long, and
would hit the bulkhead even without a hose on it, plus
it pointed straight at the bulkhead.
So I drilled the aluminum at a right angle so the hose
would be parallel to the bulkhead,
and hopefully clear. It looked really close on the spare
frame wth the spare bulkhead.
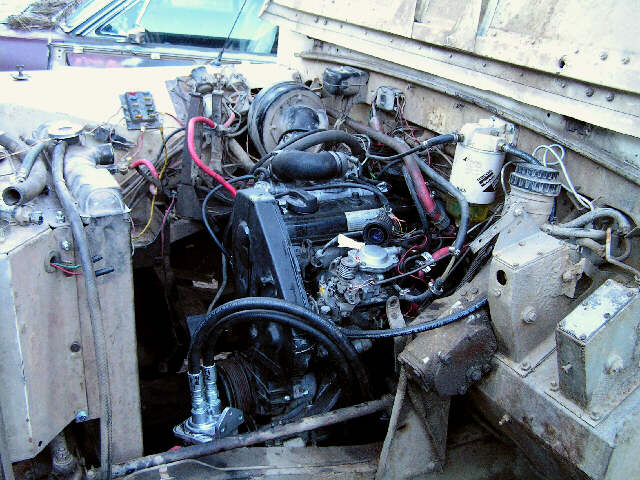
8/31/06
I have put the clutch on, and bolted
the transmission on. I put everything in the engine bay
enough to bolt the clutch slave
on. I found that the throwout baring wouldn't contact the
presure plate, even at max adjustment.
I pulled it all back out and apart and thought a lot.
I ended up welding a spacer onto
the "bearing", actualy the metal part that extends out
from the clutch housing.
I put everything back in again. This time it did push on the
pressure plate, but wouldn't release.
I took it all back out again and took a close look
at everything. I believe what the
problem really is, is that the BMW clutch disc is too
thick, and the fingers are getting
pulled in way too far. They are about flat, maybe even in
a little, so the pressure plate
is probably out of space to move. I looked up some specs
on the driven plates. Toyota -
7.5mm thick, Rover 9" either 8.39 or 8.5mm , I found 2
different specs. The BMW plate
I had measures 10.4 mm, WAY too thick. So much for
trying to save money on the clutch
disc. Time to order a Rover one.
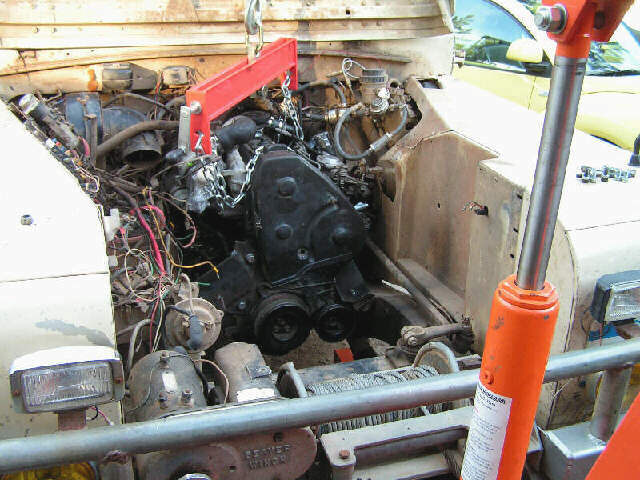
So in the meantime, I decided to
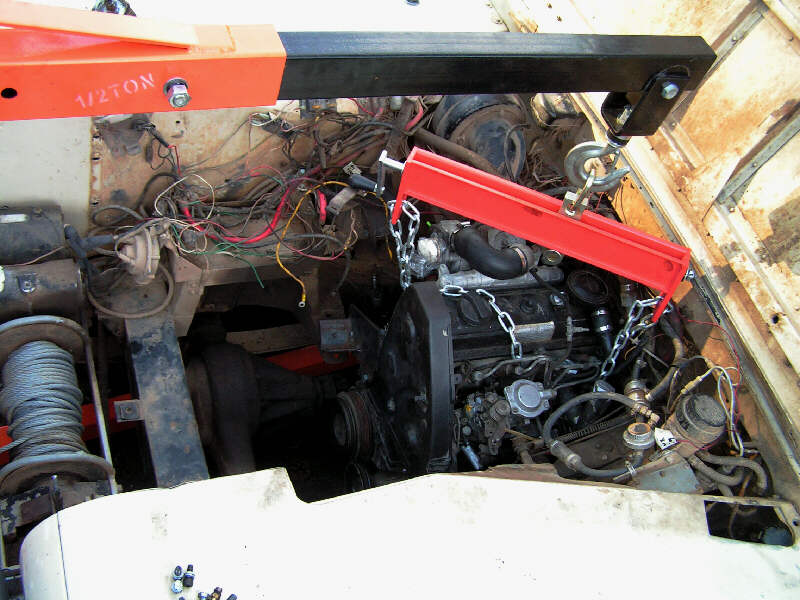
see if the engine would fit in without the tranny. After
lots of maneuvering, pulling and
shoving, I got it in and on the motor mounts!! It is VERY
close to the bulkhead where the
heater outlet is however. I will have to pull all the hoses,
wires and accelerator linkage off
to get a really good look. I think I may have to move the
starter switch because of where
the exhaust will go. The steering will clear everything
and the throttle linkage shouldn't
be too hard to modify.
To be continued.....